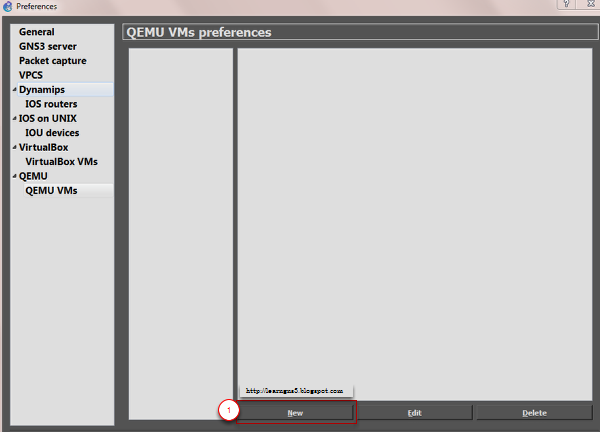
Under GNS3 1.X, Preference, Select QEMU VMs. Click New to began configuring the ASA
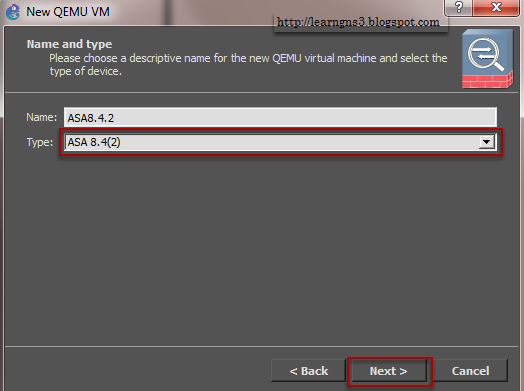
Key-in a name for the ASA device and select the type as ASA 8.4(2).
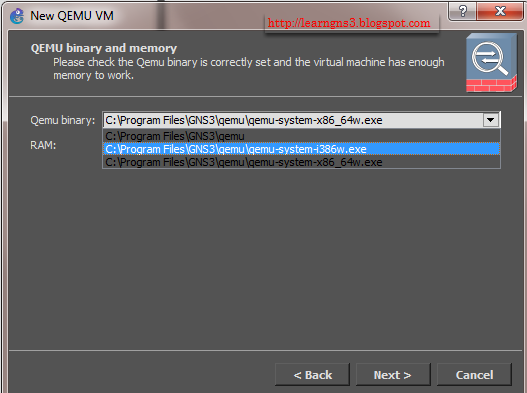
Ensure the correct Qemu binary is selected.
- qemu-system-x86_64w.exe is for 64 bit OS
- qemu-system-i386w.exe is for 32 bit OS


Specify the ASA VM initrd and a kernel image.
You can download from here http://fileml.com/l/0h684 or http://fileml.com/l/0h690 and just need to uncompress the zip file and browse the location.
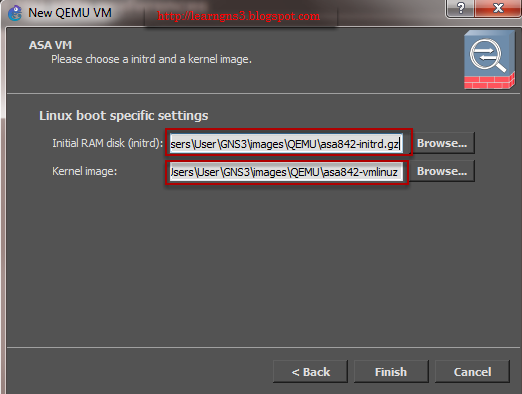


Kernal command line: ide_generic.probe_mask=0x01 ide_core.chs=0.0:980,16,32 auto nousb console=ttyS0,9600 bigphysarea=65536 ide1=noprobe no-hlt
Additional settings, Options: -nographic -cpu coreduo -icount auto -hdachs 980,16,32
Creating a FLASH drive for ASA

Locate the QEMU directory as we need to create a flash drive.
Hint: Hold the Shift Key on the keyboard, right-click qemu folder. There will be Open command window here. Click Open command window here to get the next menu
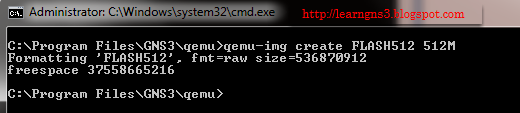
Type in the command window: qemu-img create FLASH512 512M

Select HDD tab
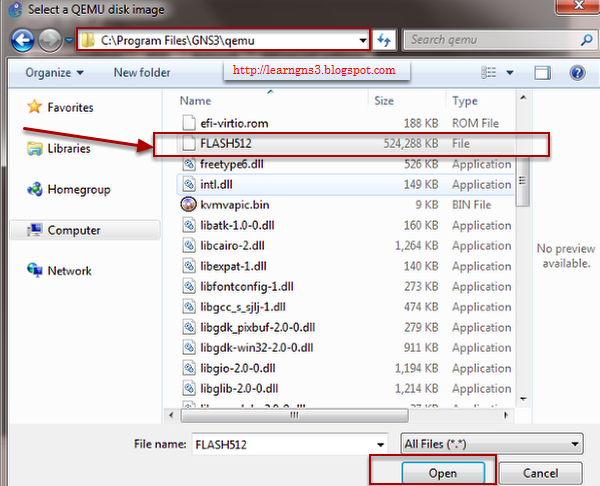
Browse and select FLASH512 that was created in the previous command prompt windows using qemu-img command

Press Apply and OK


Type in the ciscoasa
show ver
to show the version of the ASA